Diablo IV: Infernal Hordes Guide — How to Survive Season 5?
Diablo IV isn't like your regular MMORPGs, and we have solid evidence to prove our case. Even though the game is a story-based and narrative-driven masterpiece, players have spent almost a year, and they never seem to run out of new content, thanks to the regular upgrades and season system. As a result, players must constantly grind through various activities to earn XP, level up, and unlock the most powerful gear to keep up with the ever-increasing difficulty.
In this regard, the Infernal Hordes is an endgame activity introduced at the start of Season 5. This new feature is perhaps the best place to grind for XP, defeat unlimited demons, acquire exquisite loot items, and even test out the newest features of your character build. However, the game doesn't mention anything about how to master this system; that's where we come into the spotlight. In this article, we will discuss the Diablo IV: Infernal Hordes guide and walk you through all the important steps, let's get started:
Blogs Table Contents
Blogs Diablo IV: What are the Infernal Hordes?
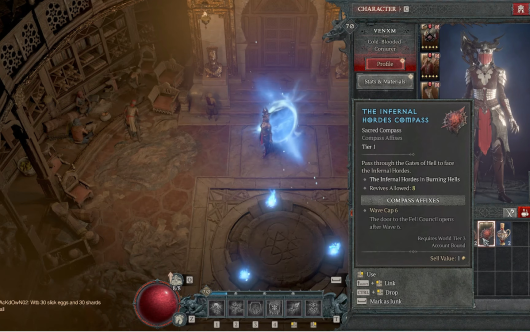
The Infernal Hordes is a wave-based endgame survival activity in Diablo IV that somewhat combines the concepts of Nightmare Dungeons and Helltide Events. In this mode, players must survive through multiple waves of demons, monsters, and Elites and collect Burning Aethers along the way. Each wave lasts for around 60 seconds, and the enemy level gradually increases as you defeat more and more troops. In the end, the activity culminates into an epic boss battle and players get to spend all their acquired Aethers in unlocking loot chests.
Blogs How to Unlock the Infernal Hordes?

Even though the Infernal Hordes is considered an endgame activity, it has no character level requirements, and players can partake in it as early as World Tier 3. The only prerequisite to starting this activity is that the players must acquire Infernal Compasses of various Infernal Hordes Tiers and use them to unlock specific hell areas, pretty much the same as Nightmare Sigils.
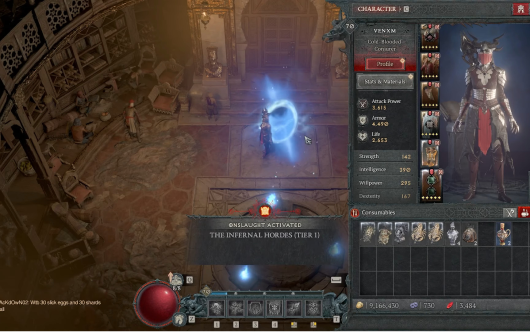
You can get these Infernal Compasses from regular enemies, defeating world bosses, completing Helltide Events, and participating in Nightmare Dungeons, The Pit, Whisper Caches, and, of course, Infernal Hordes. However, the game doesn't actually start dropping these rare keys until you complete the "Eyes of the Enemy" priority quest in Zarbinzet. This quest appears at the end of World Tier 2, and players can complete it as soon as they enter World Tier 3. Once you complete the quest, you will receive 1x Tier 1 Infernal Compass that you can use to start your very first Infernal Hordes.
Blogs Where to Find Infernal Compass in Diablo IV?

Okay, so you got your first Tier 1 Infernal Compass by completing the introductory quest, but completing this activity just once isn't really worth it. So, now you must find additional compasses of higher Tiers to increase the difficulty settings and drop even rarer rewards. Fortunately, you don't need to look too far away to stock up your Infernal Compass supply. All you need to do is take part in activities like defeating world bosses, Helltide Events, The Pit, Nightmare Dungeons, The Whisper Caches, and Infernal Hordes.
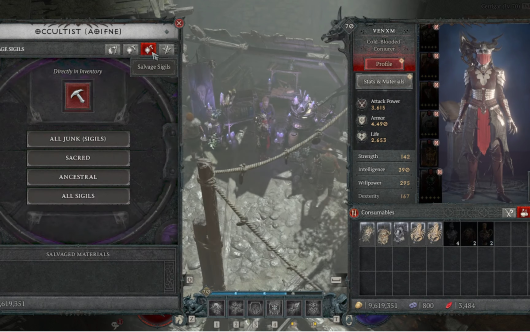
The only problem is that you can only drop Infernal Compasses up to Tier 3 from these natural sources. For higher Tiers, you must disassemble your Tier 1, 2, and 3 Infernal Compasses to get Abyssal Scrolls. Finally, visit the Occultist to upgrade your Tier 3 Infernal Compasses to Tier 4 and so on by using these Abyssal Scrolls. You can use this method to upgrade your Compasses up to Tier 10, the maximum Infernal Hordes Tier in Diablo 4 Season 5. Keep in mind this upgrade and crafting system will only unlock after you complete the "To the Edge of The Abyss" quest, so make sure to put it on your priority list.
Note: As per the latest update, players can also craft Tier 1, 2, and 3 Infernal Compasses by using Sigil Powder and Forgotten Souls. Simply visit the Occultist with these materials and browse through the available recipes to craft your desired Infernal Compasses.
Blogs Diablo IV: Infernal Hordes Progression
You can use your Infernal Compasses to start various Tier Infernal Hordes activities. Currently, there are 10 Tiers of this activity, and each comes with better rewards and higher-level troops. However, the overall setting of this activity remains the same in all 10 Tiers, so you don't need to look it up online whenever you unlock a higher Tier Compass. That being said, here is the general progression of Infernal Hordes and everything you need to know about this mechanism:
Blogs Infernal Hordes Tiers
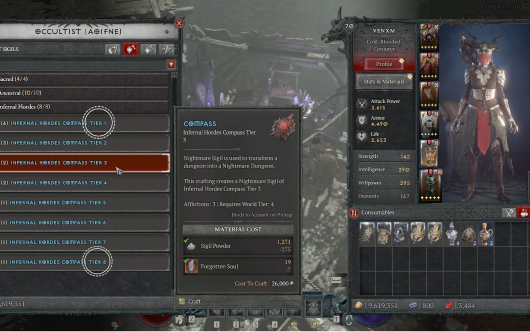
As mentioned earlier, currently, there are 10 Tiers of Infernal Hordes. Higher-tier realms will drop better rewards but also drastically expand the difficulty settings. So, it is important to start at Tier 1 and gradually shift to higher Tiers as you upgrade your character and equip better tools for the harder enemies. Here is a list of all Infernal Hordes Tiers and their stats:
Difficulty | Source | Waves | Revives | Monster Level |
Tier 1 | Loot from the World or Craft | 6 | 8 | 60 |
Tier 2 | Loot from the World or Craft | 6 | 4 | 80 |
Tier 3 | Loot from the World or Craft | 6 | 3 | 100 |
Tier 4 | Upgrade from Tier 3 | 7 | 3 | 120 |
Tier 5 | Upgrade from Tier 4 | 7 | 3 | 140 |
Tier 6 | Upgrade from Tier 5 | 8 | 2 | 160 |
Tier 7 | Upgrade from Tier 6 | 9 | 2 | 180 |
Tier 8 | Upgrade from Tier 7 | 10 | 2 | 200 |
Tier 9 — coming in the S5 midseason patch | Upgrade from Tier 8 | TBA | TBA | TBA |
Tier 10 — coming in the S5 midseason patch | Upgrade from Tier 9 | TBA | TBA | TBA |
Blogs Infernal Hordes Wave System
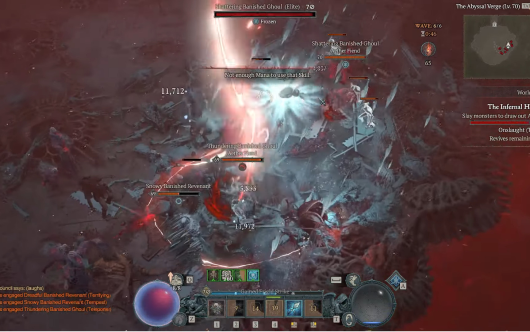
If you look closely at the above table, you can see the details for each Tier of Infernal Hordes activities. The source tab indicates from where you can acquire the respective Infernal Compass for each Tier. Similarly, the Waves tab shows the actual number of enemy attack waves the player must survive before they unlock the Fell Council event and face the final boss of the activity. Also, each wave lasts for around 60 seconds, so you better come equipped with the finest tools and maybe a few party members if possible.
Next up, the Revives tab shows the number of times a player can be revived after getting killed within the Realm of Hell (Infernal Horde Dungeon). Dying more times than the permitted revives will reset the Infernal Horde, take away all your looted items, and send you back to the normal realm, basically a waste of Infernal Compass. Lastly, the Monster Level tab shows the maximum enemy level in all the waves that the player must face to reach the final boss. However, it doesn't cover the enemy boss level or even the type, as it is completely randomized.
Blogs Burning Aether

If you have already played a Helltide Event, you may be familiar with the concept of Aberrant Cinders. These are special currencies that players must collect to open Tortured Gifts and earn various rewards. In the case of the Infernal Hordes, the players must collect Burning Aether, another unique currency, by killing various enemies and completing micro-tasks. At the end of the activity, players can use their acquired Burning Aethers to open any Spoils of Hell chest and gain Legendary items ranging from crafting materials, weapons, armor sets, and even gold.
Blogs Infernal Offers
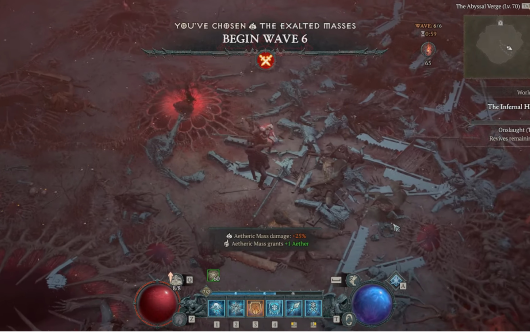
Playing the Infernal Hordes activity seems like participating in a gameshow. You must complete challenging tasks and survive to get your rewards. Moreover, the host constantly gives you perks and offers that ease up some parts of the game while add difficulty to some other part. Same is the case with the Infernal Offers! Basically, players must choose one of the three available Infernal Offers after surviving through each wave of enemies.
These offers are completely randomized and come with Boons (Good) and Banes (Bad) at the same time. Furthermore, the choices you make stack up as you make your way to the final boss battle, yielding extraordinary rewards if you play your cards well during the journey. Here are a few short examples of Boon and Bane (Infernal Offer) to make things a bit understandable:
The Burning Rain:
- Boon: At the end of each wave, spawn 3-9 Aether
- Bane: Hellfire rains upon you
The Burning Hellborne:
- Boon: Hellborne drop 2 additional Aether
- Bane: Hellfire now spawns Hellborne
The Aether Rush:
- Boon: Gathering Aether increases movement speed (8s)
- Bane: Normal monster damage +25%
Blogs Fell Council
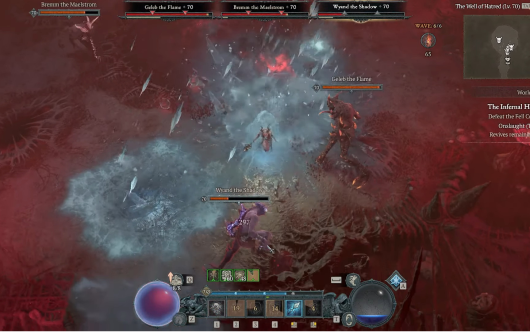
Once players have survived the maximum waves for their current Infernal Hordes Tier (1 to 10), they will encounter the Fell Council. According to the Lore, the Fell Council was initially instated to keep Hell and Primary Evil at bay. However, they have corrupted over time, and now players must face them as evil bosses to end the Infernal Hordes activity.
The player must summon and fight 3 randomly selected Fell Council Members (demon bosses) to complete the Infernal Hordes activity and proceed to the reward mechanism. All three demons will be summoned at the same time and players must fight and defeat them simultaneously while keeping the revives counter in check. Unfortunately, there is no way to predict which council members you will face in each Tier as it is strictly an RNG system. However, it doesn't mean that you haven't already defeated most if not all, of these demons in the normal realm. Here is a list of all 5 Fell Council Member demons that you can fight inside Infernal Hordes:
- Wyand the Shadow
- Geleb the Flame
- Maffer the Cruel
- Bremm the Maelstrom
- Ismail the Accursed
Blogs Spoils of Hell
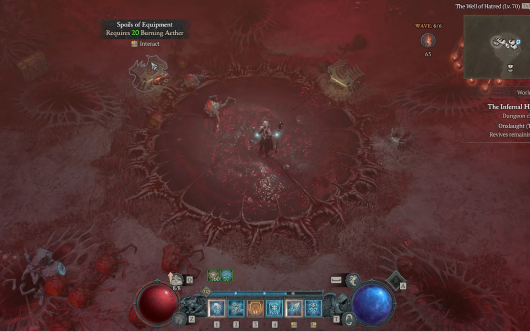
Finally, after defeating the Fell Council Trio, players get to spend their hard-earned Burning Aethers. If you look around the empty battle arena, you will find 4 chests with different opening costs and rewards. Players can use all their Aethers on all 4 chests, spend equally on all chests, or even convert their remaining Burning Aethers into gold. In any case, players must spend all of their Burning Aether at the end of the activity, as it doesn't get carried over to their next attempts. Here is a list of all Spoils of Hell Chests, their costs, and rewards to help you choose:
- Spoils of Equipment: This chest drops items like Weapons, Staffs, and Armor sets ranging from Legendary and Unique to Mythic Unique rarity with a chance of GA rolls. Opening this chest once will cost 20 Burning Aethers.
- Spoils of Greater Equipment: This chest drops items like Weapons, Staffs, and Armor sets ranging from Legendary and Unique to Mythic Unique rarity with a guarantee of GA rolls. Opening this chest once will cost 60 Burning Aethers, but it is only available in Infernal Hordes Tier 3 and above.
- Spoils of Materials: This chest contains rare herbs, ores, Masterworking Materials, Enchanting resources, and a slight chance of dropping Abyssal Scrolls. Opening this chest once costs about 20 Burning Aethers.
- Spoils of Gold: You should open this chest at the end when you don't want any of the other offerings. Opening this chest will convert all your remaining Aethers into Gold.
Blogs How to Farm Burning Aether in Diablo IV?
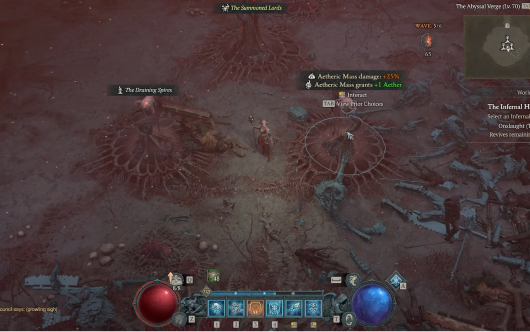
So far, we have learned that the sole purpose of participating in Infernal Hordes is to earn unlimited XP and acquire Burning Aethers to yield rare rewards. While you can drop this rare currency by defeating common and Elite ambushers and bosses, their drop rate is far too low to make up for your desired rewards from the Spoils of Hell. Fortunately, you can partake in Aether Events to farm Burning Aether and significantly increase its drop rate during the activity.
However, you must keep a closer look at the mini-map as these events only appear as small icons whenever you are close to them. Furthermore, these Stationary Encounters (Aether Events) only appear for a short period, so you must trigger them as soon as they spawn. Here is a list of all the best ways to farm Burning Aethers in Diablo 4:
- Aetheric Mass: Similar to the Arcane Tremors from Season 3, these bloody cones will appear for a short time whenever you get close to them. Destroying each Aetheric Mass will yield anywhere from 1 to 3 Burning Aethers.
- Soulspire: Players must kill all enemies within the Soulspire rings to destroy the main body. However, it appears for a short while and yields anywhere from 1 to 4 Burning Aethers.
- Aether Fiend: Also known as the Desecrator or Tormenter, these Elite troops randomly spawn as ambushers or near any of the four corners of the Abyssal Verge. Defeating each of these Elites will drop 1 Burning Aether.
- Hellborne: Hellbornes are randomly spawning Elite Troops that appear in groups of 3 during the waves. Furthermore, you can also increase their spawn rate by choosing special Infernal Offerings. Defeating each Hellborne enemy will drop 2 to 3 Burning Aethers.
- Aether Lord: These mini-bosses spawn randomly during the middle to last enemy waves. They have huge HP bars like Dungeon Bosses and come with unique move sets. Defeating these enemies will yield anywhere from 3 to 6 Burning Aethers.
- Infernal Demon: The Infernal Demon, also known as the Burning Butcher, only appears after players choose the The Stalking Devil Infernal Offer. Moreover, you can only summon him once per wave and killing him will drop 25 Burning Aethers.
Blogs Conclusion
There you have it; that's about everything in the Diablo IV: Infernal Hordes guide. Basically, you must gradually participate in higher-tier activities to maximize your rewards by facing greater enemies. While this activity is fully optional, it is crucial for players who are looking for the absolute best gear and armor sets. Hopefully, we have answered all your questions about Infernal Hordes and you are now ready to kickstart your career in Hell. Still, we suggest that you check out the rest of our website to learn more about different Diablo IV concepts, Happy Hunting!
Blogs System Requirements
Requires a 64-bit processor and operating system
Blogs PC System Requirement
| Minimum Specifications | |||
OS |
64-bit Windows® 10 version 1909 or newer |
||
CPU |
Intel® Core™ i5-2500K or AMD™ FX-8350 |
||
RAM |
8 GB RAM |
||
Graphics |
NVIDIA® GeForce® GTX 660 or Intel® Arc™ A380 or AMD Radeon™ R9 280 |
||
DirectX |
Version 12 |
||
Network |
Broadband Internet connection |
||
Storage |
90 GB available space |
||
Additional Notes |
*1080p native resolution / 720p render resolution, low graphics settings, 30fps, SSD Required |
||
| Maximum Specifications | |||
OS |
64-bit Windows® 10 version 1909 or newer |
||
CPU |
Intel® Core™ i5-4670K or AMD Ryzen™ 1300X |
||
RAM |
16 GB RAM |
||
Graphics |
NVIDIA® GeForce® GTX 970 or Intel® Arc™ A750 or AMD Radeon™ RX 470 |
||
DirectX |
Version 12 |
||
Network |
Broadband Internet connection |
||
Storage |
90 GB available space |
||
Additional Notes |
*1080p resolution, medium graphics settings, 60fps, SSD Required |
||


