

Diablo IV: To the Edge of the Abyss Walkthrough
As mentioned earlier, completing the To the Edge of the Abyss quest comes with quite a few prerequisites. So, you must prepare for this challenging quest in advance, or you might get stuck later on in the game. For instance, you must acquire at least one Infernal Compass, which you will get by completing The Eyes of the Enemy quest, a preceding Priority Quest. This compass allows you to teleport to the Depths of Hell, so it is an important item to face The Fell Council.
Similarly, you can only attempt the seasonal Priority Quests after the endgame sequence. Therefore, it is absolutely crucial to finish the entire game at least once on any character (you can start a new game later on). Lastly, you can only complete this quest on World Tier 3 or higher. So, if you are still stuck in WT2, we suggest that you head to the Cathedral of Light Capstone Dungeon and clear it to proceed to WT3.
Lastly, this step is optional, but we can’t emphasize it enough; Temper your Weapons and get the Elixir of Fire Resistance and Lightning Resistance. Otherwise, you don’t stand a chance against The Fell Council regardless of your Diablo IV character build. Once you complete these steps, you are ready to start and complete the To the Edge of the Abyss quest.
With the prerequisites out of the way, it is time to start the To the Edge of the Abyss quest. You will get this Priority Quest at WT3 after completing the two preceding quests, so track and immediately head to the Caldeum Imperial Palace. Inside the palace, you will find Locran waiting for you near the Keep. Speaking with Locran will start the quest and update you with the first objective, i.e., “Find the Gates of Hell.”
Bug Update: Many players are stuck with the Diablo IV: To the Edge of the Abyss Bug, where Locran doesn’t spawn in his designated location. Consequently, if you can’t interact with him, you can’t start the quest. After a few hours of research, we have found the perfect fix for this bug:
- Completely close the game, restart your PC, and login again.
- If that doesn’t fix the bug, then try exiting and re-entering the dungeon.
- Finally, if none of the above fixes work, then switch to World Tier 2 and complete this quest using these settings. This last fix is 100% guaranteed to work, but switching back to WT3 will make Locran disappear again.
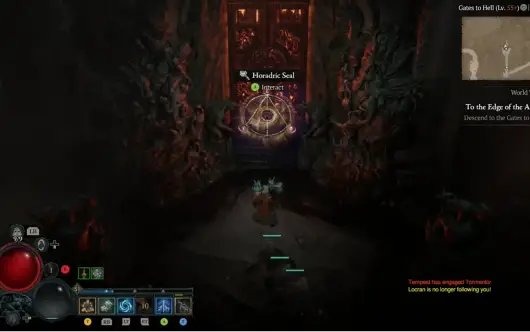
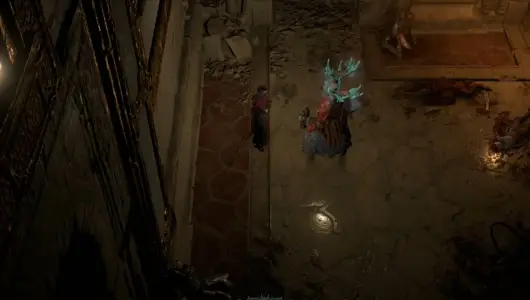
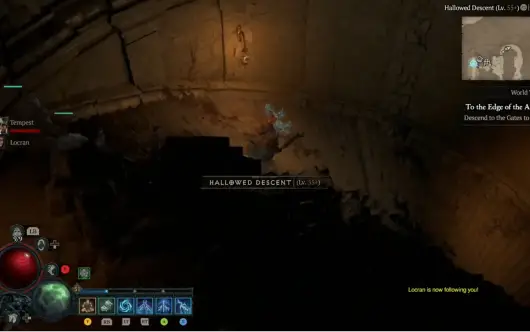
Once you start the quest, follow the marker to proceed through Hallowed Descent. You will encounter several lesser enemies and one or two Elites on your way, so stick close to Locaran and protect him at all costs. Next, break the Hastily Constructed Barricade with any light weapon and keep going straight until you find a large gate with a Horadric Seal. Interact with the Seal and then speak with Locaran to proceed forward.
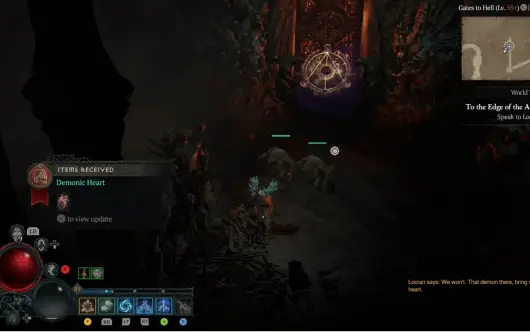
Here, Locaran will tell you that this is the Gate to Hell and asks you to bring a Demonic Heart. Don’t worry; you don’t have to go too far, as you can just extract the Heart from the nearby corpse. Finally, bring the Heart back to Locaran and protect him while he performs the ritual to open the Gates of Hell.
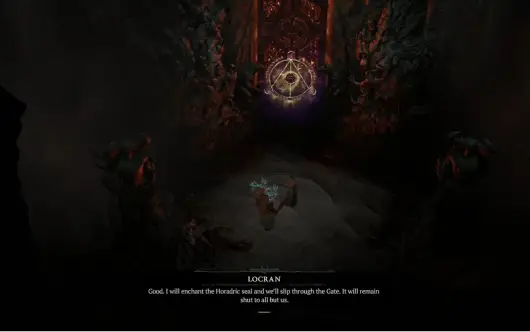
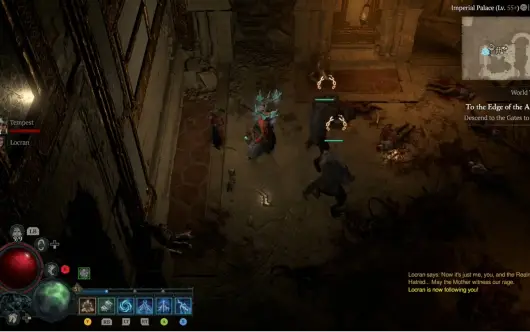
After Locaran does his stuff, he will tell you that the Gate of Hell will remain shut for everyone but us. So, follow him to the Burning Hell: Realm of Hatred through the Gates of Hell to enter the Desolation Fields. This next dungeon is quite long and filled with countless enemy troops, so proceed with caution and use all your skills. Oh, and don’t forget to protect Locaran as his survival is extremely important for your success.
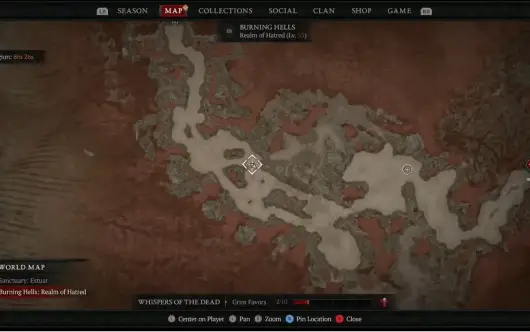
If you open the mini-map, you can check your way forward to the Opening of Darkness. Even though it doesn’t appear on the map, you can find it by going all the way to the end of the straight path. Finally, place the Talisman of Locaran into the Well of Hatred and survive your very first Infernal Horde while Locaran communes with The Fell Council.
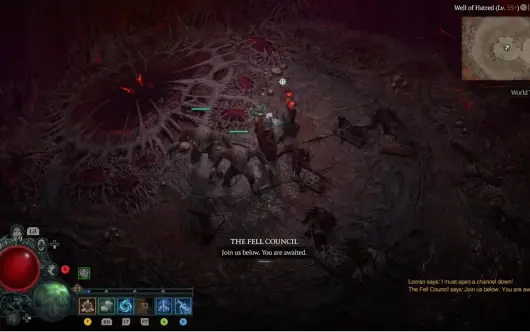
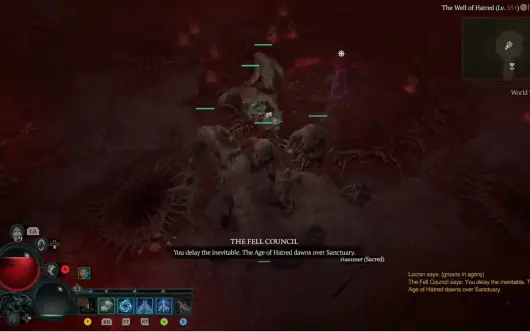
Now that all the steps have been completed, all that remains is to face off The Fell Council. If you checked our Infernal Hordes Guide, you already know that this Council consists of 5 mini-bosses. So, the last step in completing the To the Edge of the Abyss quest is to defeat all of these bosses and keep the Hell contained for good.
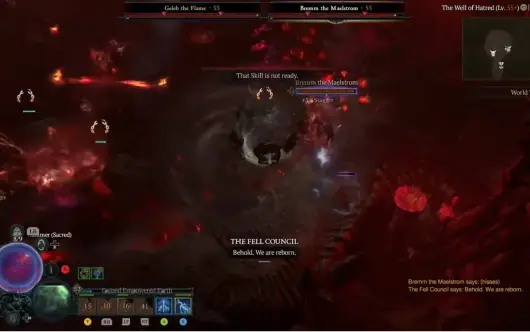
Okay, so you will face the Council Leaders in random pairs of two in normal Infernal Hordes. However, this one is special as you must face three of them in different phases and they remain the same for all playthroughs. However, before you can start the fight, you must head to the Abyssal Verge and let Locaran do his thing one last time while you stand guard. During this stage, you will constantly get harassed by lesser troops, Elites, and members of The Fell Council. This final boss fight consists of the following Council Leaders:
- Geleb the Flame
- Bremm the Maelstrom
- Maffer the Cruel
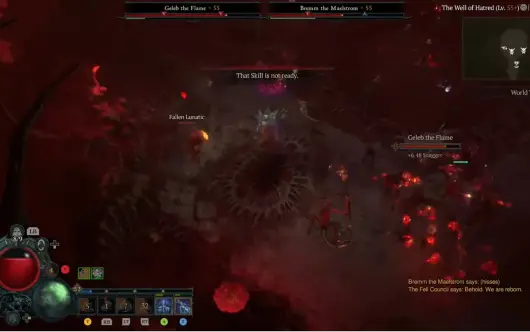
This fight consists of three major phases. During the first phase, you must fight one of the above Fell Council Leaders and survive his attacks. Next, a group of lesser enemies will attack you while the Council prepares for the next battle. During the second phase, the phase 1 boss will be revived, and you must face two Council Bosses at the same time, followed by another attack by lesser troops. Finally, the third phase will take one of the Revived Fell Council members and throw in the remaining boss in the fight. At this stage, it is imperative to use all your might, weapons, skills, HP potions, and Elixirs to survive.
While we know the three confirmed members that you must face in the quest, their order is still based on RNG. Therefore, you should always be prepared for all three members as we don’t know their exact order. Also, use the weaker hordes between the boss phases to collect health potions. Here are the common attack patterns that we encountered during our playthrough:
Fell Council Member | Attacks | How to Counter |
Geleb the Flame |
|
|
Bremm the Maelstrom |
|
|
Maffer the Cruel |
|
|

Once you defeat all Fell Council members and clear out any remaining minions, your character will have a brief chat with Locaran. He asks for your pledge to keep the Hell contained and save the Sanctuary. Finally, collect any remaining loot from the battle arena and interact with the burning waypoint to teleport back to the Sanctuary. This final step marks the end of the To the Edge of the Abyss quest and you are now free to collect or craft as many Infernal Compasses as you can to participate in the Diablo 4 Infernal Hordes events.