Branding
Menu Closer

SoulMask: Where to Get Iron in Early Game?

Time
Time
Soulmask Team Editor

You can’t expect to fight high level enemies in SoulMask using your stone or bone weapons. Fortunately, you will gradually progress from stone to bronze, iron, and finally, advanced weapons while creating your own tribe. For instance, you will start the gameplay with basic stone and wood weapons, then advance to the bronze age, and finally end up creating iron gear and weapons. The only problem is that the game doesn’t really explain where to find all these exotic resources for your advanced crafting.

So, if you have just unlocked iron technology and are looking for iron ores, we are here to help. This article covers where to get iron in the early game to make iron ingots and iron weapons in SoulMask; let’s get started:

Blogs Table Contents

Blogs Where to Find Iron in SoulMask?

Iron is an important crafting resource in SoulMask required to create iron ingots that are used in crafting advanced weapons and gear items. However, iron is quite scarce in the mysterious lands, and you can’t expect to accidentally stumble upon a large pile. Furthermore, even if you somehow find a large iron mine, you must face high level tribesmen and even deadly mechanical beasts to extract the resource.

Therefore, it is extremely important to start preparing for your age advancement as soon as you wear your first mask. For best results, you should build basic smelting structures and learn how to tame animals in SoulMask before even considering to walk into an iron mine. Once you have the basic resources and a few bronze pickaxes, you can visit these locations to get iron in the early game.

There are two ways to get iron in SoulMask, i.e., collect metal scraps and mine iron ores.

Blogs 1. Collect Iron from Metal Scraps

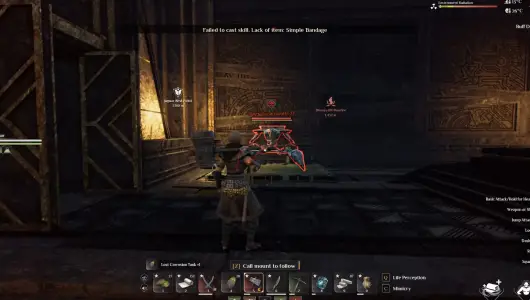
The earliest form of iron that you can get in SoulMask is in the form of metal chunks, metal parts, and metal plates. While we do recommend that you save metal parts and plates for later recipes, you can easily craft iron weapons by only utilizing the metal chunks or scraps. In order to collect iron from metal chunks, you must visit special areas known as Ancient Ruins Dungeons.

Iron Ancient Dungeon

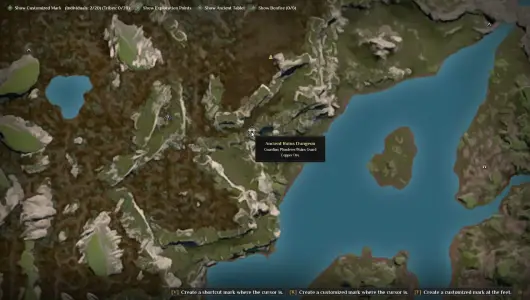
Currently, there are 4 of these dungeons scattered across the huge world map. You can find various recipes, exotic resources, and loot items by clearing these dungeons. As our goal is just iron and metal scraps, we will be focusing only on the Ancient Ruins Dungeons located in the Northern Wastelands. Originally, you can visit this dungeon to harvest copper for the bronze age, but you can still find a considerable amount of metal scrap if you go deeper into the dungeon.

Metal Scraps

We suggest that you tame a fast animal and mount it to avoid unnecessary conflict as you go deep into the Ancient Ruins Dungeon. Keep going until you find two golden doors at the end of the dungeon. Here, you must defeat several enemies like Mechanical Cores, Elite Plunderers, and Slayers. So, take out your corrosion tanks and use your most powerful weapons to defeat all mechanical enemies. Once you have defeated them all, you can loot their remains to harvest metal chunks, parts, platers, and exotic crystals.

Blogs 2. Extract Iron Ores

Mine Iron Ore

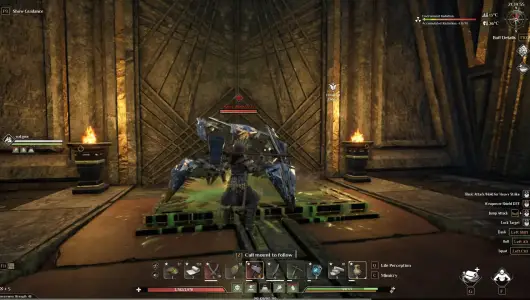
The most obvious way to get iron in SoulMask is to extract raw iron ores directly from the mines. However, you will need at least a bronze level pickaxe to break these iron nodes. Secondly, the iron mine is heavily guarded by level 40+ Claw Tribesmen, so you should only visit this location after getting iron gear. 

The best iron mine in SoulMask is in the desert region located in the northern corner of the world map. Oh, and you must expect heat damage during the day and frost damage during the night when venturing across this region. Therefore, it is important to wear proper clothing when visiting this location.

Iron Mine Location

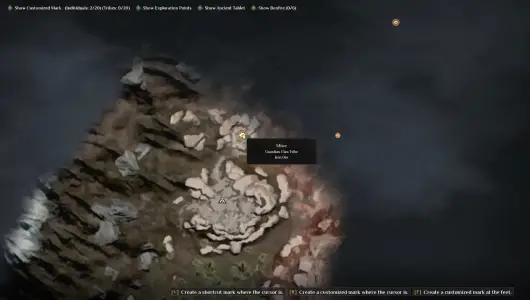
Once you clear out all the local tribesmen, take out your bronze pickaxe and start hitting the large grey-ish boulders in the area to extract iron ores. You can accumulate as many as 10x iron ores from a single stone, so make sure to bring a mount to easily carry your gathered resources back to the base.

Blogs How to Use Iron in SoulMask?

Carbon Powder

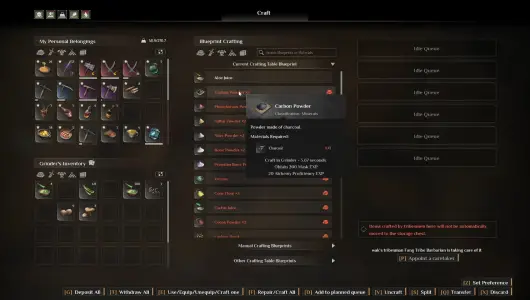
Okay, so you have just acquired more iron than you can store in the safehouse. However, you can’t use raw iron in any of the iron technology gear and recipes. So, the next step is to convert it to iron ingots and use it in crafting your iron projects. For this purpose, you must first build a kiln in your camp to produce Charcoal to burn in your campfire, furnace, and smelter. Another bi-product of Charcoal is Carbon Powder, used in crafting iron ingots.

Iron Ingot Item

You can create Carbon Powder by grinding Charcoal in your local grinder. Once you have a running furnace, interact with it and select iron ingot. Next, insert 1x Carbon Powder and 2x of either metal scraps or iron ore to get 1x iron ingot. Again, we can’t emphasize enough that you should save metal parts and metal plates for future recipes. So, you should only melt metal chunks and iron ores to craft iron ingots.

Blogs Conclusion

You will eventually advance to iron age after crafting everything in the bronze technology tree. This transition requires you to find new locations to source iron and metal parts to use in your crafting projects. Hopefully, this article has guided you about where to get iron in SoulMask for both early game and mid-game phases. If you have any ideas or questions, feel free to reach out in the comments section below.

Blogs System Requirement

Requires a 64-bit processor and operating system

Blogs PC System Requirement

Minimum Specifications

CPU

Intel Core i5-8400 / AMD Ryzen 3 3300X

RAM

16 GB RAM

Graphics

GTX 970 4GB / AMD RX 580 4GB

OS

Windows 10 64-bit or Windows 11 64-bit

Storage

25 GB available space

DirectX

Version 12

Maximum Specifications

CPU

Intel Core i7-9700 / AMD Ryzen 7 3700X

RAM

24 GB RAM

Graphics

GeForce RTX 2060 / Radeon RX 5700 XT or above

OS

Windows 10 64-bit or Windows 11 64-bit

Storage

25 GB available space

DirectX

Version 12

Back to Arrow